Your exterior door is one of the hardest-working parts of your home. It faces the sun, the heat, the monsoon rains, and daily use all while needing to look good, keep your home secure, and seal tightly against Arizona’s extreme temperatures.
So when it’s time to replace it, you want the job done right. But here’s the thing: exterior door installation is more complex than most homeowners realize. Even experienced DIYers can make mistakes that lead to drafts, water damage, and premature failure mistakes that end up costing thousands to fix.
In this guide, we’ll walk you through the most common exterior door installation mistakes what they are, why they happen, and how to avoid them. Whether you’re hiring a professional or tackling the job yourself, knowing these pitfalls will help you get a door that performs beautifully for decades.
And when you’re ready for expert exterior entry door installation, Windowz4Less Arizona is here to help.
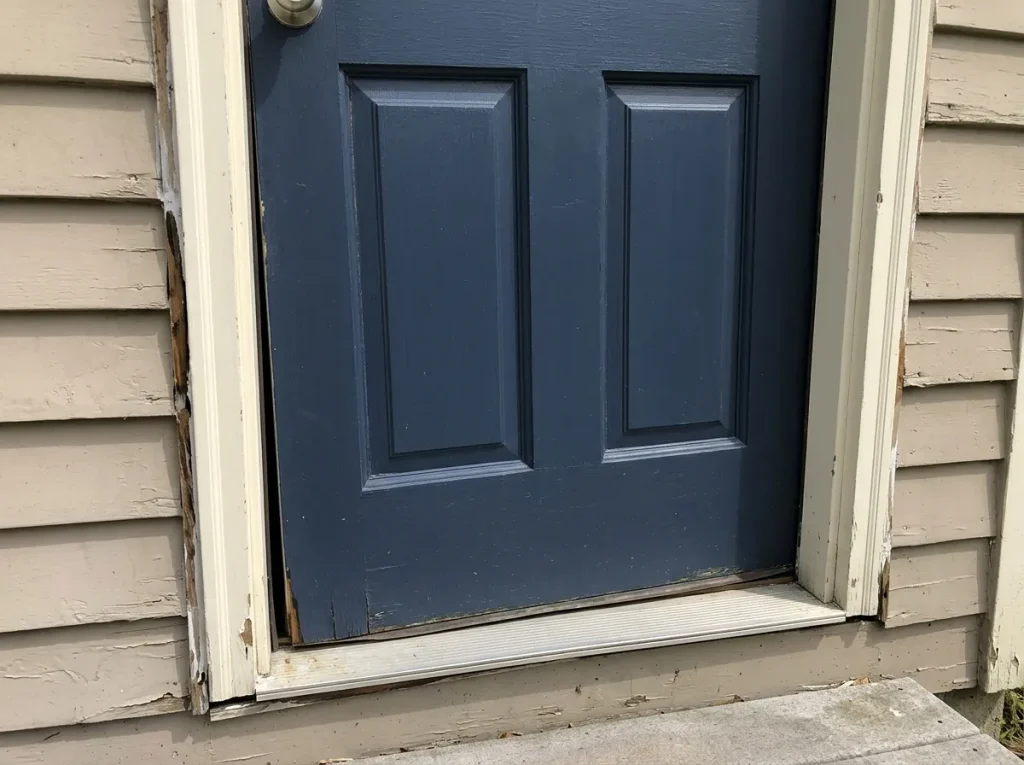
Key Takeaways / Quick Summary
- Improper flashing is the #1 source of door leaks leading to rot, mold, and structural damage
- Using standard expanding foam can bow the door frame always use low-expansion foam designed for doors
- Failing to anchor into structural studs leaves the door vulnerable to being pried open
- Skipping the sill pan allows water to pool and cause rot at the base of the door
- Over-tightening screws can warp the frame and cause misalignment
- Not checking for rot before installation is a costly mistake repair damage before installing
- Poor alignment causes sticking, binding, and drafts level and square the door carefully
- Not sealing properly leads to air leaks and higher energy bills
- DIY installation usually voids manufacturer warranties professional installation protects your investment
Mistake #1: Improper Flashing and Waterproofing
This is the most critical mistake and the most common.
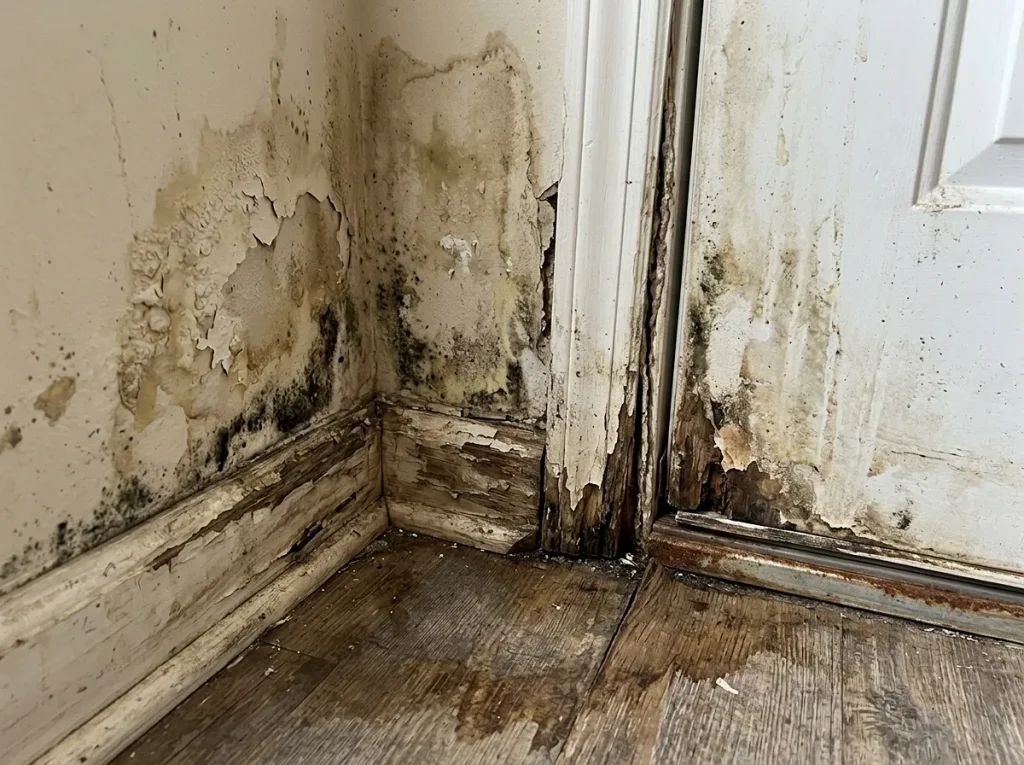
What happens: Installers skip flashing, use the wrong materials, or install flashing in the wrong order. Water finds its way behind the door frame, leading to rot, mold, and structural damage.
Why it’s a problem: Improper flashing is the #1 source of door leaks. Water infiltration doesn’t just damage the door it can rot the framing and sheathing around it, leading to repairs that cost thousands.
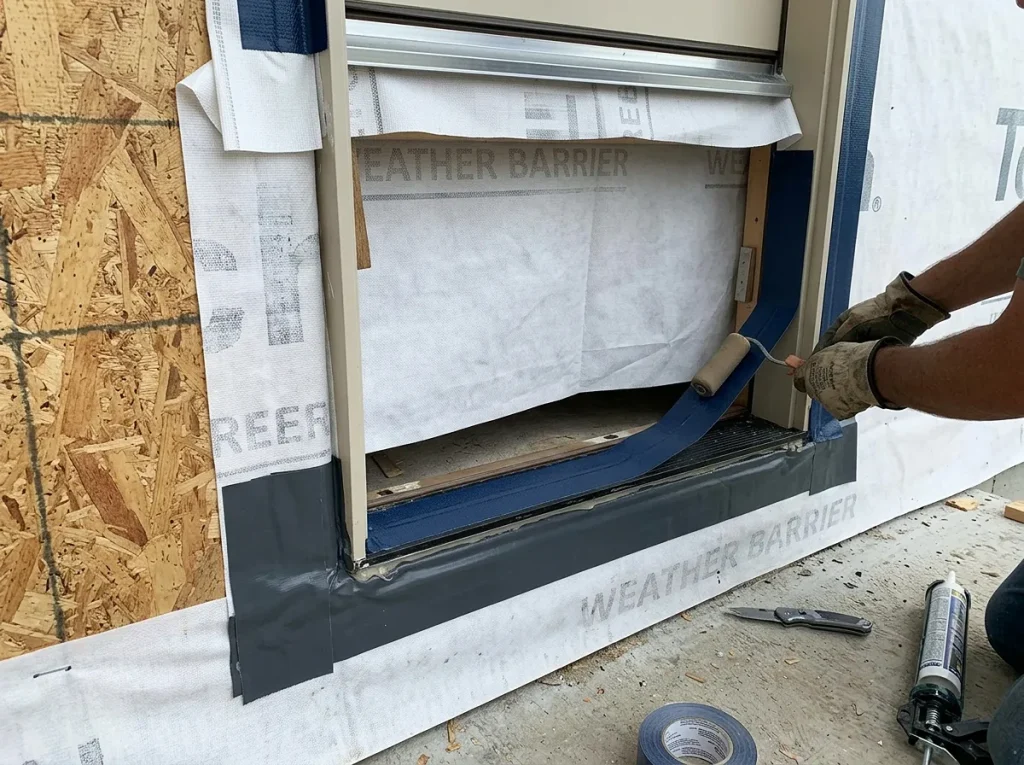
The right way: Flashing must be installed in shingle-style layers sill first, then sides, then top. Use self-adhering waterproof membrane around the entire opening. Install a sill pan or sloped sill to direct water away from the wall.
The cost of getting it wrong: Water damage repairs can cost 1,500–15,000+ depending on the extent of rot and structural damage.
Mistake #2: Skipping the Sill Pan
Drainage details are too often overlooked.
What happens: Installers skip the sill pan or sloped sill because it seems like an extra step. Water has nowhere to go, so it pools at the base of the door.
Why it’s a problem: Trapped water leads to rot around the door frame one of the biggest problems in even relatively new houses.
The right way: Install a sloped sill pan or apply flashing tape in a way that creates positive drainage. A sloped rough opening sill makes a big difference.
The cost of getting it wrong: Rot repair at the base of a door typically costs 500–3,000+.
Mistake #3: Using the Wrong Foam
This is one of the most common DIY mistakes.
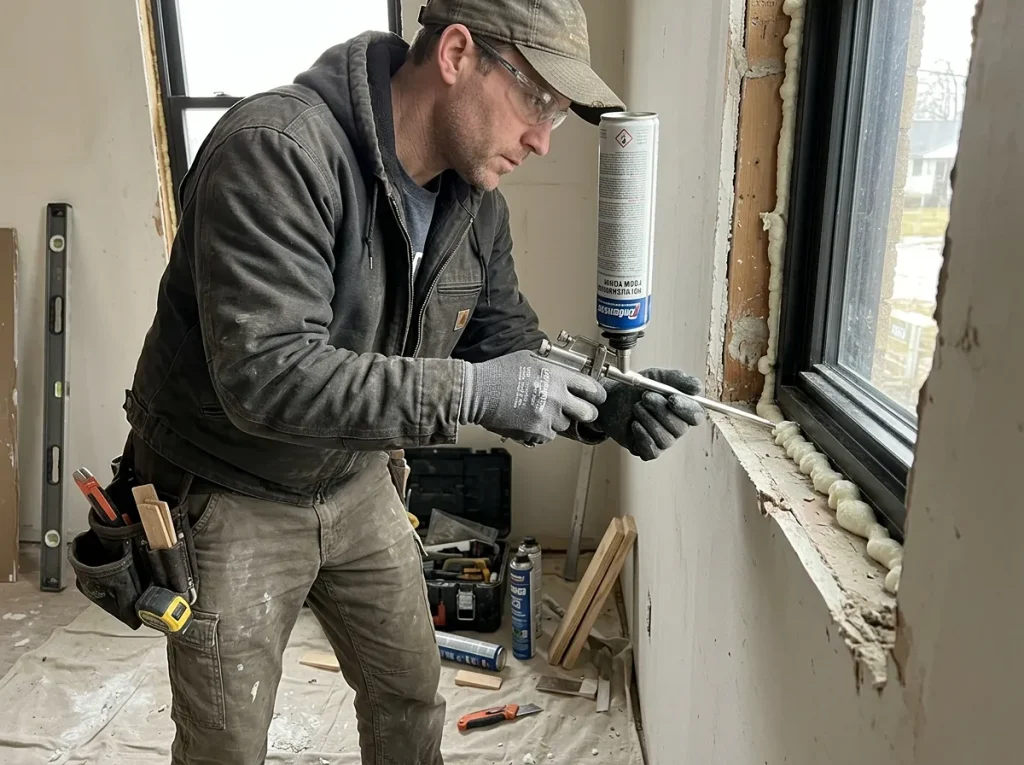
What happens: Installers use standard high-expansion spray foam instead of low-expansion foam designed for doors and windows.
Why it’s a problem: High-expansion foam can bow the door frame inward, making the door impossible to close properly. It can also warp the frame and compromise the door’s operation.
The right way: Use low-expansion polyurethane foam specifically formulated for doors and windows. It fills gaps without applying excessive pressure to the frame.
The cost of getting it wrong: If the frame is bowed, the door may need to be removed and reinstalled costing 500–1,500+ in additional labor.
Mistake #4: Insufficient Anchoring
What happens: The door is anchored only into stucco, drywall, or the exterior siding not into the structural studs behind the wall.
Why it’s a problem: A door anchored only into stucco can be pried out of the wall with a crowbar. It’s also more vulnerable to shifting over time, which causes alignment problems.
The right way: Anchor the frame into the structural studs using 3-inch or longer screws. Use multiple anchor points along the frame for maximum stability.
The cost of getting it wrong: Security is compromised, and the door may shift, causing sticking, drafts, and premature failure.
Mistake #5: Poor Alignment and Leveling
What happens: The door is installed slightly out of level or square. It seems fine at first, but within weeks, it starts sticking, binding, and failing to lock properly.
Why it’s a problem: If the door isn’t perfectly level and square, it won’t operate smoothly. The weatherstripping won’t seal, leading to drafts and water infiltration. The locks won’t align, compromising security.
The right way: Use shims to level and square the frame. Check with a level on all sides. Test the door through multiple open-close cycles before finalizing. Make adjustments as needed.
The cost of getting it wrong: A misaligned door requires adjustment or reinstallation 200–500+ in additional labor.
Mistake #6: Not Checking for Rot Before Installation
What happens: The installer removes the old door and installs the new one without inspecting the rough opening for rot or water damage.
Why it’s a problem: Installing a new door over rotted framing is like building a house on a cracked foundation. The rot spreads, the door shifts, and the new door fails prematurely.
The right way: Inspect the rough opening thoroughly. Replace any damaged wood before installing the new door. This is especially important in older Arizona homes where sun damage and dry rot are common.
The cost of getting it wrong: If rot spreads, you’ll need to replace the door and repair the framing 1,000–5,000+.
Mistake #7: Over-Tightening Screws
What happens: The installer over-tightens screws during anchoring, causing the frame to warp or bend.
Why it’s a problem: Over-tightening can distort the frame, pulling it out of square. The door won’t close properly, and the locks won’t align.
The right way: Tighten screws snugly not as tight as possible. Use a screwdriver or drill with a clutch setting to avoid over-tightening.
The cost of getting it wrong: A warped frame may require reinstallation or replacement 300–1,000+.
Mistake #8: Not Sealing Properly
What happens: The installer skips caulking or uses the wrong type of sealant. Gaps remain around the frame.
Why it’s a problem: Gaps let in air, water, and insects. They also create pry points for intruders. In Arizona, air leaks drive up cooling costs.
The right way: Apply exterior caulk around the entire perimeter of the door frame. Use a high-quality, paintable caulk designed for exterior use. Check for air leaks and seal as needed.
The cost of getting it wrong: Higher energy bills, water damage, and pest problems.
Mistake #9: Ignoring Manufacturer Specifications
What happens: The installer assumes all doors are installed the same way and skips the manufacturer’s instructions.
Why it’s a problem: Every door has specific installation requirements fastener spacing, anchoring locations, and flashing details. Skipping these steps can void the warranty and compromise performance.
The right way: Read and follow the manufacturer’s installation instructions. They’re there for a reason.
The cost of getting it wrong: Voided warranty, poor performance, and potential failure.
Mistake #10: DIY Installation Without Proper Skills
What happens: Homeowners try to save money by installing the door themselves without the necessary skills or tools.
Why it’s a problem: Exterior door installation requires precise measurements, proper flashing, structural anchoring, and correct sealing. A botched DIY job leads to leaks, drafts, and premature failure. Most manufacturer warranties are voided by DIY installation.
The right way: Hire a professional with experience in exterior door installation especially one who understands Arizona’s stucco construction.
The cost of getting it wrong: Repairs, water damage, and voided warranties. What starts as a money-saving DIY can spiral into thousands in repairs.
Real-World Conditions: The “If/Then” Guide to Avoiding Installation Mistakes
Here’s how to avoid mistakes based on your specific situation:
If you’re hiring a professional → Then ask about their experience with stucco exteriors and their approach to flashing and waterproofing. A good installer will have clear answers.
If you’re considering DIY → Then think carefully about the risks. Exterior door installation is not a beginner project. A botched job voids warranties and costs more to fix than hiring a pro in the first place.
If you have a stucco exterior → Then make sure your installer knows how to cut back the stucco to access the structural framing. This is a common mistake for inexperienced installers.
If you live in a monsoon-prone area → Then prioritize proper flashing and drainage. Water infiltration during monsoon season is a major risk.
If you’re replacing an older door → Then have the installer inspect the rough opening for rot before installation. Repair any damage before proceeding.
If you want maximum energy efficiency → Then ensure the door is properly sealed and insulated. Air leaks negate the benefits of an energy-efficient door.
If you’re concerned about security → Then make sure the door is anchored into structural studs, not just stucco. Add a multi-point locking system for maximum protection.
If you’re planning to sell your home → Then professional installation with proper flashing and sealing protects your investment and appeals to buyers.
The Regrets Homeowners Mention Most
After helping thousands of Arizona homeowners with exterior door installation, here are the most common regrets:
Mistake 1: Hiring the cheapest installer
The lowest bid often cuts corners on the most critical steps flashing, anchoring, and sealing. Saving $200 on installation can cost you thousands in water damage repairs.
Mistake 2: Using standard expanding foam
This is one of the most common DIY mistakes. High-expansion foam bows the frame and ruins the door’s operation. Always use low-expansion foam.
Mistake 3: Skipping the sill pan
Water needs a path to escape. Without a sill pan, it pools at the base of the door and causes rot.
Mistake 4: Not checking for rot
Installing a new door over rotted framing is a recipe for failure. Inspect and repair the rough opening before installation.
Mistake 5: Assuming all installers know how to work with stucco
Arizona’s stucco homes require special techniques. Installers who aren’t experienced with stucco may damage the wall or fail to anchor the door properly.
Mistake 6: Not getting everything in writing
Verbal promises are worthless when a problem arises. Get all warranties, timelines, and costs in writing.
Frequently Asked Questions
What’s the most common exterior door installation mistake?
Improper flashing is the most common and most costly mistake. It leads to water infiltration, rot, and mold. Proper flashing is essential for a leak-free installation.
Can I install an exterior door myself?
While DIY installation is possible, it’s risky. Exterior doors require precise alignment, proper flashing, and structural anchoring. Poor installation leads to leaks, sticking, and premature failure and voids most warranties. For best results, hire a professional.
What type of foam should I use for exterior door installation?
Use low-expansion polyurethane foam specifically designed for doors and windows. Standard high-expansion foam can bow the frame and lock the door in place.
Why is flashing so important?
Flashing directs water away from the door and into the weather-resistive barrier. Without it, water finds its way behind the frame, causing rot, mold, and structural damage.
How do I know if my door was installed correctly?
Check that:
- The door opens and closes smoothly
- Locks engage securely
- There are no gaps or drafts
- The frame is level and square
- The door seals tightly against the weatherstripping
What happens if I use the wrong foam?
High-expansion foam can bow the door frame, making the door impossible to close properly. It can also warp the frame and compromise operation.
Do I need a permit for exterior door installation in Arizona?
Generally no for like-for-like replacements. However, if you’re changing the size or location of the door, you may need a permit. Check with your local building department.
How much does it cost to fix a bad exterior door installation?
Fixing a bad installation can cost 500–5,000+ depending on the extent of the damage water damage, rot repair, and reinstallation.
What should I look for in an exterior door installer?
Look for:
- Valid ROC license
- Liability insurance and workers’ comp
- Experience with stucco exteriors
- Positive references
- Detailed written quote
- Clear warranty information
What’s the best way to avoid installation mistakes?
Hire a professional with experience in exterior door installation especially one who understands Arizona’s stucco construction. A qualified installer will know how to flash, anchor, and seal the door correctly.
Why Choose Windowz4Less Arizona?
Windowz4Less Arizona specializes in exterior door installation for homes across the Phoenix metro area. We understand Arizona’s unique construction methods including stucco exteriors and we know how to install doors that perform beautifully for decades.
- Local expertise We know Arizona’s stucco homes and how to properly flash and anchor exterior doors
- Quality products We offer steel, fiberglass, and wood exterior doors from leading manufacturers
- Professional installation Our team is trained, insured, and follows industry best practices
- Transparent pricing No hidden fees, no surprises
- Free estimates No-obligation quotes with honest, straightforward advice
- Serving Mesa, Phoenix, and surrounding areas We’re your local experts
When you work with us, you get exterior entry door installation that’s done right properly flashed, perfectly aligned, and built to last. Don’t risk costly mistakes trust the professionals.
Your Next Step: Avoid Mistakes with Professional Installation
Exterior door installation is not a project to take lightly. The mistakes we’ve covered can lead to water damage, energy loss, security vulnerabilities, and thousands in repairs. The best way to avoid them? Hire a professional who knows what they’re doing.
Contact Windowz4Less Arizona today for a free, no-obligation estimate. We’ll assess your opening, recommend the right door, and provide professional exterior entry door installation you can trust.