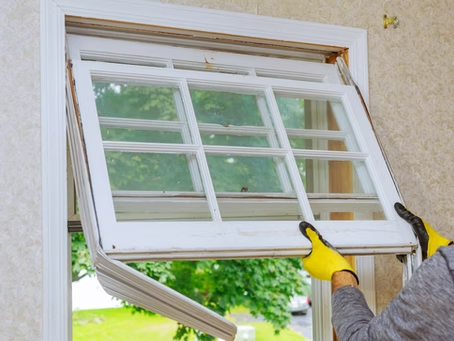
You’ve done your research. You’ve picked out the perfect windows. You’ve even measured the openings yourself. How hard can installation really be?
Here’s the honest answer: harder than you think. And the consequences of getting it wrong are much more expensive than you’d expect.
Professional window installation isn’t just about saving time—it’s about protecting your investment. Even the most energy-efficient, beautifully crafted windows will underperform, leak, or fail entirely if they’re installed incorrectly.
In this guide, we’ll walk through why professional installation matters, the most common mistakes that doom DIY projects, and how hiring the right team saves you money, stress, and headaches for decades to come.
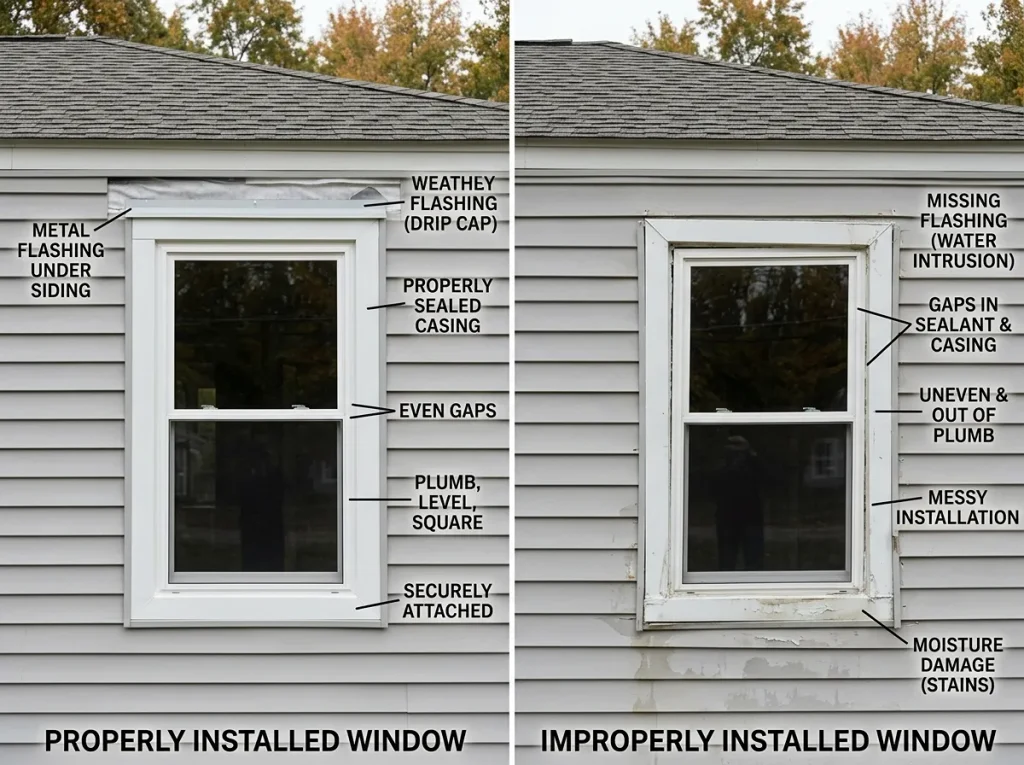
Table of Contents
Key Takeaways / Quick Summary
The Hard Truth: DIY Window Installation Usually Fails
The Most Common Window Installation Mistakes
Mistake 1: Improper Flashing
Mistake 2: Skipping Sill Pans and Drainage
Mistake 3: Poor Sealing and Insulation
Mistake 4: Incorrect Leveling and Squaring
Mistake 5: Incorrect Measurements
Mistake 6: Ignoring Manufacturer Specifications
Mistake 7: Ignoring Hidden Damage
Real-World Conditions: The “If/Then” Guide to Choosing Professional Installation
Why Professional Installation Pays for Itself
The Regrets Homeowners Mention Most
Frequently Asked Questions
Why Choose Windowz4Less Arizona?
Your Next Step: Protect Your Investment with Professional Installation
Key Takeaways / Quick Summary
- Over 70% of DIY window installations experience issues within the first five years
- Improper installation is the leading cause of window failure
- Improperly installed windows account for 25% to 50% of a home’s heat loss
- Professional installation achieves 95–98% of a window’s stated energy efficiency rating, while DIY averages only 82%
- Almost a quarter of DIY window installations fail, requiring professional intervention
- Nearly one in five DIY window projects face air or water leaks within the first year
- DIY installation typically voids manufacturer warranties, leaving you responsible for all repairs
- Professionally installed windows offer a 72% ROI at resale, compared to just 60% for DIY
The Hard Truth: DIY Window Installation Usually Fails
Let’s be real. We all love a good DIY project. There’s a sense of pride that comes with fixing something yourself.
But windows aren’t like painting a room or installing a shelf. They’re a critical structural component of your home. And the numbers don’t lie.
Studies show that over 70% of DIY window installations experience issues within the first five years. Improper installation is the leading cause of window failure. And nearly one in five DIY window projects face air or water leaks within the first year.
What most people don’t realize is that a failed DIY installation doesn’t just mean a drafty window. It means:
- Higher energy bills—improperly installed windows account for 25% to 50% of a home’s heat loss
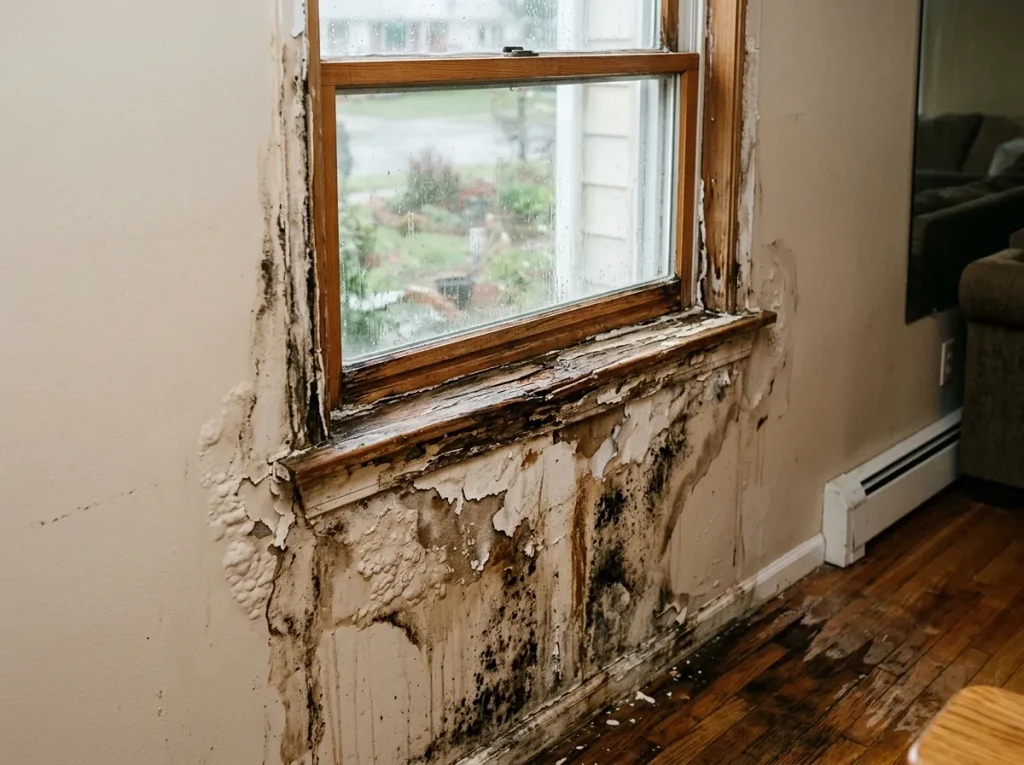
- Water damage—moisture intrusion leads to rot, mold, and structural decay
- Voided warranties—most manufacturers require professional installation for warranty coverage
- Lower home value—DIY installations typically yield a return of only 60% on the investment at resale, compared to 72% for professional work
The bottom line? Almost a quarter of homeowners’ DIY window installations fail, necessitating professional intervention. You might save money upfront, but you’ll likely pay for it later—with interest.
The Most Common Window Installation Mistakes
After years of fixing botched installations, professionals see the same mistakes over and over. Here are the most common—and the most costly.
Mistake 1: Improper Flashing
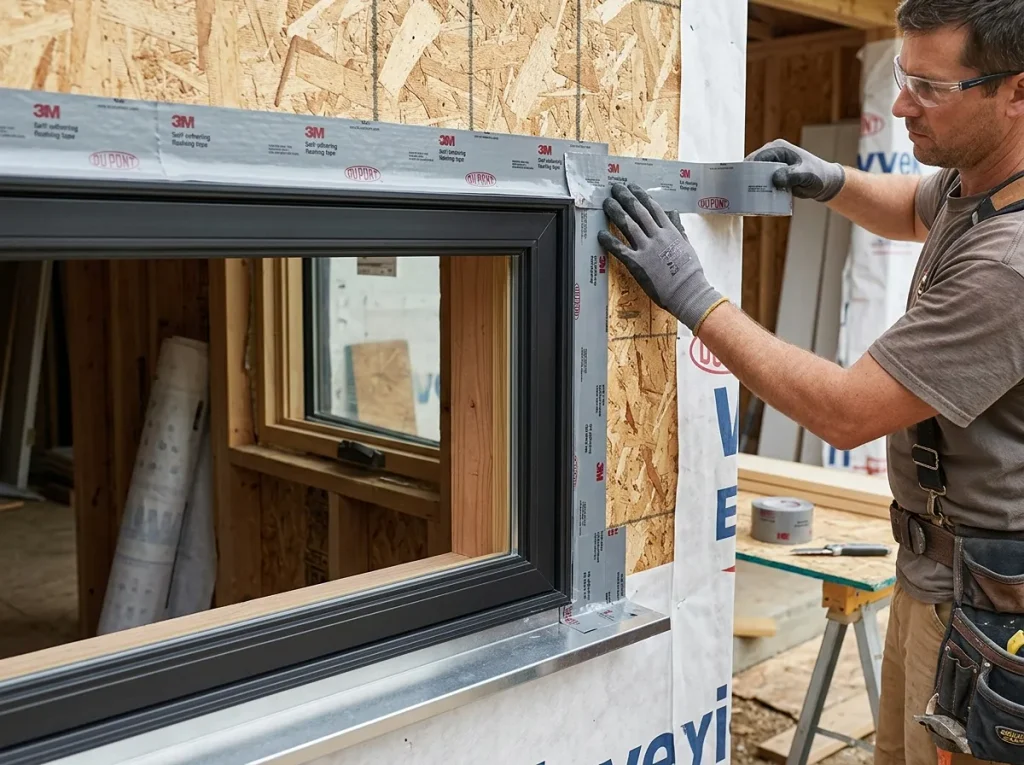
Improper or incomplete flashing is the No. 1 source of leaks. Flashing directs water away from your window and into the weather-resistive barrier. When it’s done wrong, water finds its way into your walls.
The right way: Flashing should follow shingle-style sequencing: sill first, then sides, then head flashing. A drip cap is essential. This creates positive water flow that directs moisture away from your home.
The DIY mistake: Skipping flashing altogether, using the wrong materials, or installing it in the wrong order. Homeowners often rely solely on caulk, which fails over time.
The cost of getting it wrong: Water infiltration leads to rot, mold, and structural damage. One contractor reported seeing Philadelphia homeowners face $15,000+ in structural repairs from failed DIY window installations.
Mistake 2: Skipping Sill Pans and Drainage
Drainage details are too often overlooked. Water needs a path to escape. Without proper drainage, it pools and causes damage.
The right way: Professional installers use sill pans—sloped surfaces that direct water away from the wall. A sloped rough opening sill makes a big difference.
The DIY mistake: Assuming the window itself will keep water out. It won’t.
The cost of getting it wrong: Trapped water leads to rot around the window frame—one of the biggest problems in even relatively new houses.
Mistake 3: Poor Sealing and Insulation
Another common mistake homeowners make during DIY window installations is not sealing or insulating the windows properly. Lack of sealing means water and air can get into your home easily.
The right way: Use low-expanding foam specifically designed for windows and doors. Standard expanding foam can bow the frame and lock the window in place. Professionals also use backer rod and caulk to preserve drainage while allowing flexibility.
The DIY mistake: Using the wrong type of foam, overfilling gaps, or skipping insulation entirely. Or worse—sealing off the drainage cavity behind the flange, leaving trapped water with nowhere to go.
The cost of getting it wrong: Air leaks increase your energy bills. Water intrusion leads to mold, rot, and costly repairs. Poor insulation means your HVAC system works harder, shortening its lifespan.
Mistake 4: Incorrect Leveling and Squaring
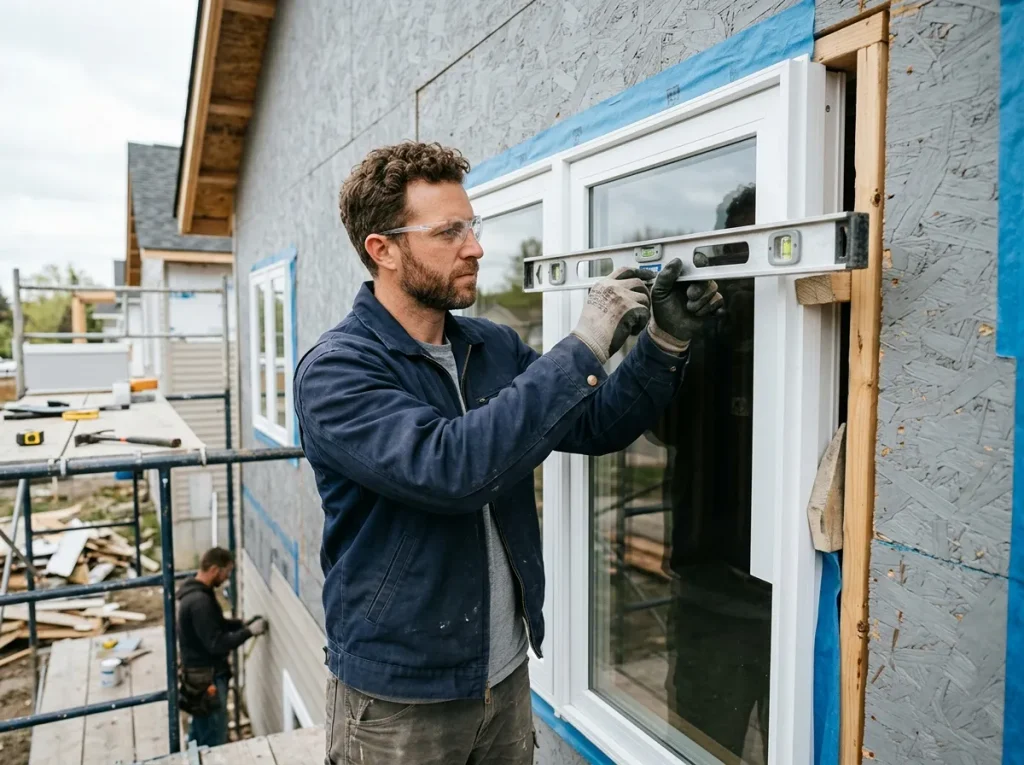
If your window isn’t level and square, it won’t operate properly. It will stick, bind, and wear out prematurely.
The right way: “If your window is wider than it is tall, then put your level on the bottom or the top and level it and then square it,” says one veteran consultant. Fasteners should be screws, not gun nails, for better control.
The DIY mistake: Rushing the fundamentals. Skipping the level. Using the wrong fasteners. Not checking that diagonal measurements match to ensure the window is square.
The cost of getting it wrong: A window that doesn’t open, close, or lock properly. Premature wear on moving parts. And a window that looks visibly crooked from the outside.
Mistake 5: Incorrect Measurements
Accurate measurements are vital for any successful window installation. A faulty measurement could mean it’s nearly impossible to fit the window in the opening.
The right way: Measure the rough opening at multiple points—top, middle, and bottom for width; left, center, and right for height. Use the smallest measurements. Ensure the outside dimensions of the window are at least ¾-inch narrower and ½-inch shorter than the smallest width and height measurements.
The DIY mistake: Measuring once and assuming it’s right. Not accounting for an uneven rough opening.
The cost of getting it wrong: A window that doesn’t fit. Period. You’re left with a custom-ordered window that’s useless for your opening.
Mistake 6: Ignoring Manufacturer Specifications
Every manufacturer provides detailed installation instructions. Following them isn’t optional—it’s required for warranty coverage.
The right way: Read and follow the manufacturer’s installation guide. It’s where spacing, compatibility, and warranty requirements live.
The DIY mistake: Assuming all windows install the same way. Skipping steps because they seem unnecessary.
The cost of getting it wrong: Voided warranties. If your window fails and you didn’t follow the manufacturer’s specs, you’re on your own for repairs.
Mistake 7: Ignoring Hidden Damage
Once your old windows are removed, you may find hidden moisture, rot, or deterioration.
The right way: Inspect the opening thoroughly. Replace any damaged wood before installing the new window.
The DIY mistake: Installing a new window over rotted framing. It’s like building a house on a cracked foundation.
The cost of getting it wrong: The new window fails prematurely. The rot spreads. What started as a window replacement becomes a major structural repair.
Real-World Conditions: The “If/Then” Guide to Choosing Professional Installation
Here’s how to decide based on your specific situation:
If you want to protect your warranty → Then choose professional installation. Most manufacturers require professional installation to maintain warranty coverage. DIY installation typically voids these warranties, leaving you responsible for product defects or performance issues.
If energy efficiency is a priority → Then choose professional installation. Professional installation typically achieves 95% to 98% of the stated energy efficiency rating, while DIY installation usually averages only 82%. That difference shows up on your energy bills every month.
If you have second-story windows → Then definitely choose professional installation. Second-story window replacement is more difficult and creates safety risks. Lifting heavy windows while atop ladders can lead to serious accidents.
If you have large or custom windows → Then choose professional installation. Oversized windows are more difficult to handle and create safety risks during installation.
If you value your time → Then choose professional installation. A professional crew can install 10 to 15 residential windows per day. A DIYer typically needs 4 to 8 hours per window.
If you’re concerned about resale value → Then choose professional installation. Professionally installed windows offer a return of 72% on the investment at resale. DIY installations generally yield only 60%.
If you want peace of mind → Then choose professional installation. Professional installation acts as a form of insurance. You’re not just paying for labor—you’re paying for expertise, proper tools, and the assurance that the job is done right.
Why Professional Installation Pays for Itself
Let’s do the math.
Upfront cost:
- DIY: You buy the windows, shims, flashing, sealants, and tools. Tools alone can cost $730–$1,750 if you don’t already own them.
- Professional: One all-inclusive quote. No hidden costs.
Energy efficiency:
- Professional: 95–98% of rated efficiency
- DIY: 82% of rated efficiency
- The difference: Higher energy bills every month for the life of your windows
Warranty:
- Professional: Full manufacturer warranty coverage
- DIY: Voided warranty
- The difference: You pay for all repairs out of pocket
Resale value:
- Professional: 72% ROI
- DIY: 60% ROI
- The difference: Thousands of dollars in home value
Risk:
- Professional: Proper installation, no leaks
- DIY: Almost a quarter fail, requiring professional intervention. Nearly one in five face air or water leaks within the first year.
- The difference: You pay twice—once for the failed DIY, once for the professional fix
What starts as a money-saving DIY can spiral into costly repairs, warranty voids, and resale issues. Professional installation isn’t an expense—it’s an investment that protects every other dollar you’ve spent on your windows.
The Regrets Homeowners Mention Most
After years of fixing botched DIY installations, here are the most common regrets we hear:
Mistake 1: “I thought I could save money by doing it myself.”
Almost a quarter of DIY window installations fail, requiring professional intervention. You don’t save money—you spend it twice.
Mistake 2: “I didn’t realize flashing was so important.”
Improper or incomplete flashing is the No. 1 source of leaks. Water damage is expensive to fix. One homeowner faced $15,000+ in structural repairs.
Mistake 3: “I used the wrong foam and now my window won’t open.”
Using standard expanding foam instead of low-expanding foam designed for windows can lock the window in place and bow the frame. That’s a costly mistake.
Mistake 4: “I didn’t know DIY would void my warranty.”
Most manufacturers require professional installation to maintain warranty coverage. DIY installations almost always void warranties.
Mistake 5: “I thought all windows install the same way.”
Different window types—sliding, casement, double-hung—have different installation requirements. Ignoring manufacturer specifications leads to failure.
Mistake 6: “I didn’t check for rot before installing.”
Installing a new window over rotted framing is like building on sand. The rot spreads, and the new window fails prematurely.
Mistake 7: “I thought caulk would fix everything.”
Caulk isn’t a cure-all. It fails over time. Proper flashing and integration with the weather-resistive barrier are essential.
Frequently Asked Questions
Why does professional window installation matter so much?
Even the best windows will fail if installed incorrectly. Improper installation is the leading cause of window failure. Professional installation ensures proper flashing, sealing, leveling, and integration with your home’s weather barrier.
Can I install windows myself to save money?
You can, but you probably shouldn’t. Almost a quarter of DIY window installations fail, requiring professional intervention. The upfront savings are often wiped out by repairs, higher energy bills, and voided warranties.
What happens if I install a window incorrectly?
The consequences range from drafts and higher energy bills to water damage, rot, mold, and structural decay. Improperly installed windows account for 25% to 50% of a home’s heat loss.
Does DIY installation void my window warranty?
In most cases, yes. Most manufacturers require professional installation to maintain warranty coverage. DIY installations typically void these warranties.
How much does professional window installation cost?
Professional labor typically ranges from $100 to $300 per window. For a typical home with 10–15 windows, that’s $1,000–$4,500 in labor—a small price for protection against costly mistakes.
How do I find a reliable window installer near me?
Look for local companies with strong reviews, proper licensing and insurance, and transparent pricing. Ask about their installation process, warranty coverage, and experience with your specific window type. A professional will walk you through the window installation process before you commit.
What’s the most common window installation mistake?
Improper or incomplete flashing is the No. 1 source of leaks. Water infiltration leads to rot, mold, and structural damage that can cost thousands to repair.
Can a bad installation really affect my energy bills?
Yes. Improperly installed windows account for 25% to 50% of a home’s heat loss. Professional installation achieves 95–98% of a window’s stated energy efficiency, while DIY averages only 82%. That difference shows up on your energy bills every month.
Why Choose Windowz4Less Arizona?
Windowz4Less Arizona understands that great windows are only half the equation. The other half is expert installation.
- Local expertise — We know Arizona’s unique climate and install windows that perform in extreme heat
- Certified professionals — Our team is trained, insured, and follows manufacturer specifications to protect your warranty
- Proper techniques — We use correct flashing, sealing, leveling, and waterproofing—every time
- Transparent pricing — One all-inclusive quote. No hidden fees.
- Warranty protection — We install to manufacturer specifications so your warranty stays intact
- Serving Mesa, Phoenix, and surrounding areas — We’re your local experts
Whether you’re exploring window installation services or ready to book, we’re here to help.
Your Next Step: Protect Your Investment with Professional Installation
Don’t become another DIY failure statistic. The money you “save” on DIY installation is quickly eaten up by repairs, higher energy bills, and voided warranties.
Contact Windowz4Less Arizona today for a free, no-obligation estimate. We’ll install your windows correctly the first time—so you can enjoy the comfort, energy savings, and peace of mind you deserve.