You’ve finally decided to replace your old, drafty windows. You’ve picked out the style, the material, and the glass package. Now comes the big question: what actually happens on installation day?
Here’s the honest answer: professional window installation is more than just popping out the old window and sliding in a new one. It’s a carefully executed process that involves preparation, waterproofing, precise fitting, and detailed finishing work. When done right, your new windows will perform beautifully for decades. When done wrong, even the best windows can fail.
In this guide, we’ll walk you through the window installation process step by step—from the moment the installers arrive to the final cleanup. Whether you’re preparing for your own installation or just curious about what goes into it, this guide will demystify the entire process.
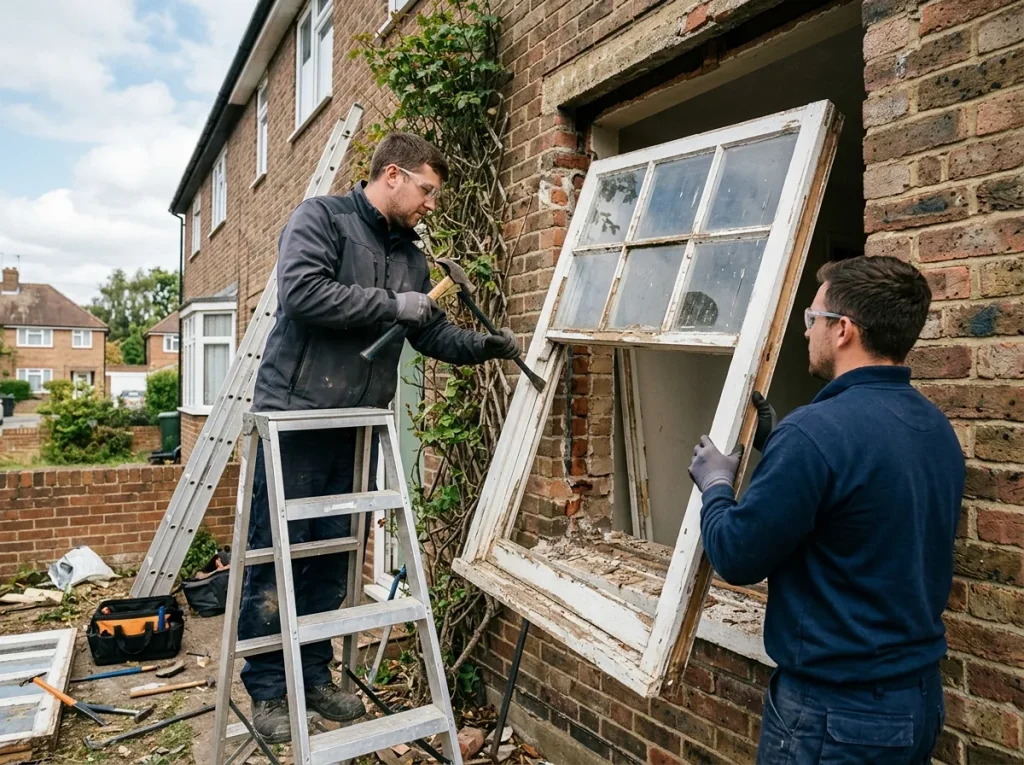
Table of Contents
Key Takeaways / Quick Summary
Step 1: Preparation — Before Installation Day
Step 2: Removing the Old Window
Step 3: Inspecting and Preparing the Rough Opening
Step 4: Waterproofing — The Most Critical Step
Step 5: Positioning the New Window
Step 6: Securing and Shimming
Step 7: Insulating and Sealing
Step 8: Finishing Touches
How Long Does the Window Installation Process Take?
Real-World Conditions: The “If/Then” Guide
Professional Installation vs. DIY: The Real Cost
The Regrets Homeowners Mention Most
Frequently Asked Questions
Why Choose Windowz4Less Arizona?
Your Next Step: Get Started with Professional Installation
Key Takeaways / Quick Summary
- Professional window installation typically takes 30–60 minutes per window, with a full home (10–15 windows) completed in 1–2 days
- A standard replacement window costs $500–$1,000 installed, with the average double-hung, double-pane vinyl window around $600 in 2025
- ENERGY STAR-certified windows can lower household energy bills by an average of 12% nationally
- Improper installation is the #1 cause of window failure—even the best windows perform poorly when installed incorrectly
- The installation process includes 7 key steps: preparation, removal, inspection, waterproofing, positioning, securing, and finishing
- Most manufacturer warranties are voided by DIY installation—professional installation protects your investment
- Waterproofing the rough opening is critical—rot around windows is one of the biggest problems in even relatively new houses
Step 1: Preparation — Before Installation Day
The installation process doesn’t start when the crew arrives. It starts the day before.
What the installers do:
Professional installers begin by protecting your home. They lay down drop cloths to protect your floors from dirt and debris. They move furniture away from the windows and remove curtains, blinds, or decorative items that could get in the way.
What you should do:
Clear the area around each window—inside and out. Move furniture, take down window treatments, and ensure there’s a clear path for the installers to work. If you have pets or small children, plan to keep them away from the work areas for safety.
This preparation phase is often overlooked, but it makes a huge difference in how smoothly installation day goes.
Step 2: Removing the Old Window
The first hands-on step is removing your existing window.
Here’s what happens:
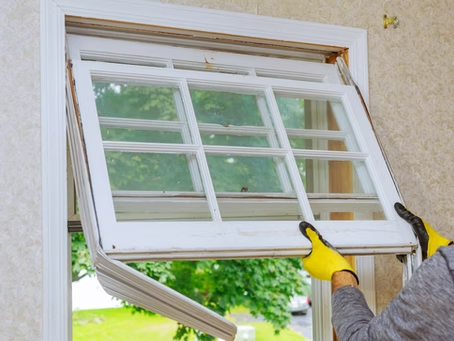
Installers use a utility knife to cut through paint or caulk seals around the window frame. They carefully remove the interior trim, taking care not to damage the surrounding wall. Then they remove the window sashes, all hardware, and any components that aren’t part of the window frame.
In some cases, especially with older homes, the installers may need to remove the entire existing frame down to the rough opening—the framed hole in the wall where the window sits.
Why this matters:
Removing an old window isn’t just about clearing space. It’s about exposing the rough opening so the installers can inspect for damage, repair any issues, and start fresh with a clean, solid surface.
Step 3: Inspecting and Preparing the Rough Opening
Once the old window is out, the installers inspect the rough opening.
They’re looking for:
- Rot or water damage in the framing
- Signs of pest infestation
- Uneven or out-of-square openings
- Any structural issues that need attention
If they find damage, they’ll repair it before proceeding. This might involve removing affected wood and replacing it with rot- and mildew-resistant material. According to Tom Silva, general contractor for This Old House, “Rot around windows, even in relatively new houses, is one of the biggest problems I see. You can’t depend on just the trim and the housewrap to stop water.”
Measuring the opening:
Installers measure the width and height of the rough opening at multiple points. If there’s more than a 1-inch difference between measurements, they may need to adjust the opening or choose a different window size.
Step 4: Waterproofing — The Most Critical Step
This is where professional installation truly separates itself from DIY.
Why it’s critical:
Water infiltration is the #1 cause of window failure. Improperly waterproofed windows can lead to rot, mold, and structural damage that costs thousands to repair.
What the installers do:
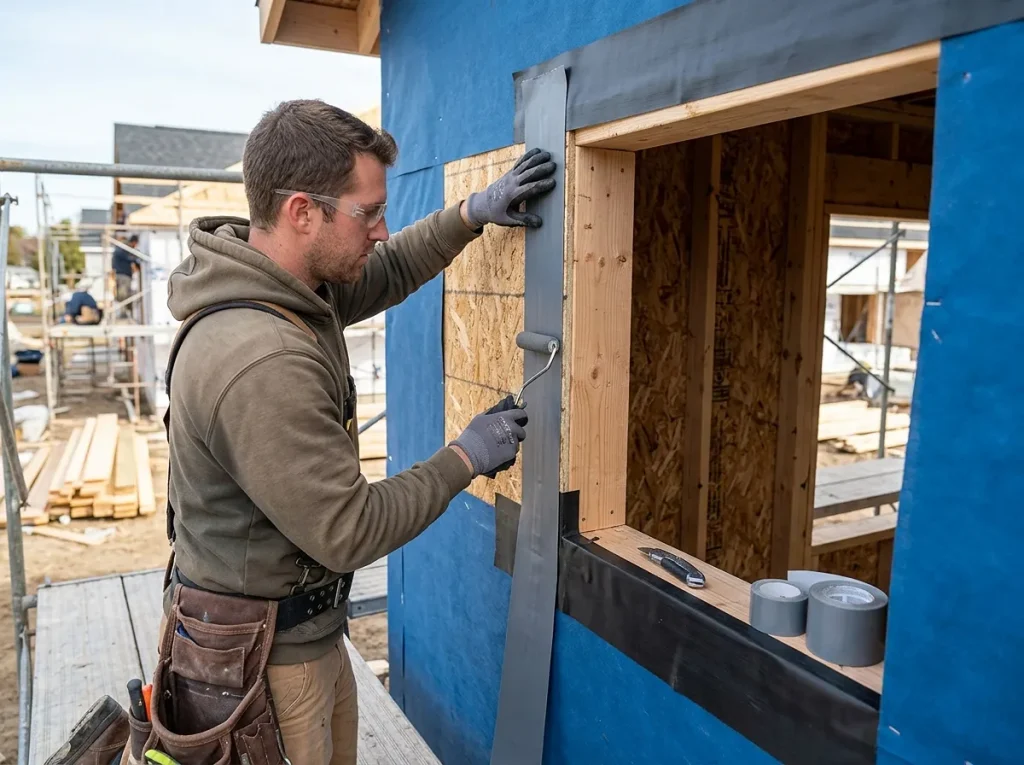
They apply a self-adhering waterproof membrane around the opening. This involves cutting strips of membrane to fit under the sill, along the sides, and across the top of the opening, overlapping them to create a watertight seal.
Many professionals also install a window sill pan—a sloped surface that directs water away from the wall. This added layer of protection is especially important in climates with heavy rain or monsoon seasons.
Flashing the sill:
Flashing the sill with a continuous piece of flex wrap along the bottom and 6 to 8 inches up both sides gives water a path out should it ever penetrate. Flashing ensures the window is connected to the weather-resistive barrier, not an exposed part of the rough opening.
Step 5: Positioning the New Window
With the opening prepared and waterproofed, it’s time to install the new window.
Here’s the process:
- Apply caulk: Installers apply a bead of caulk around the perimeter of the opening where the window will sit.
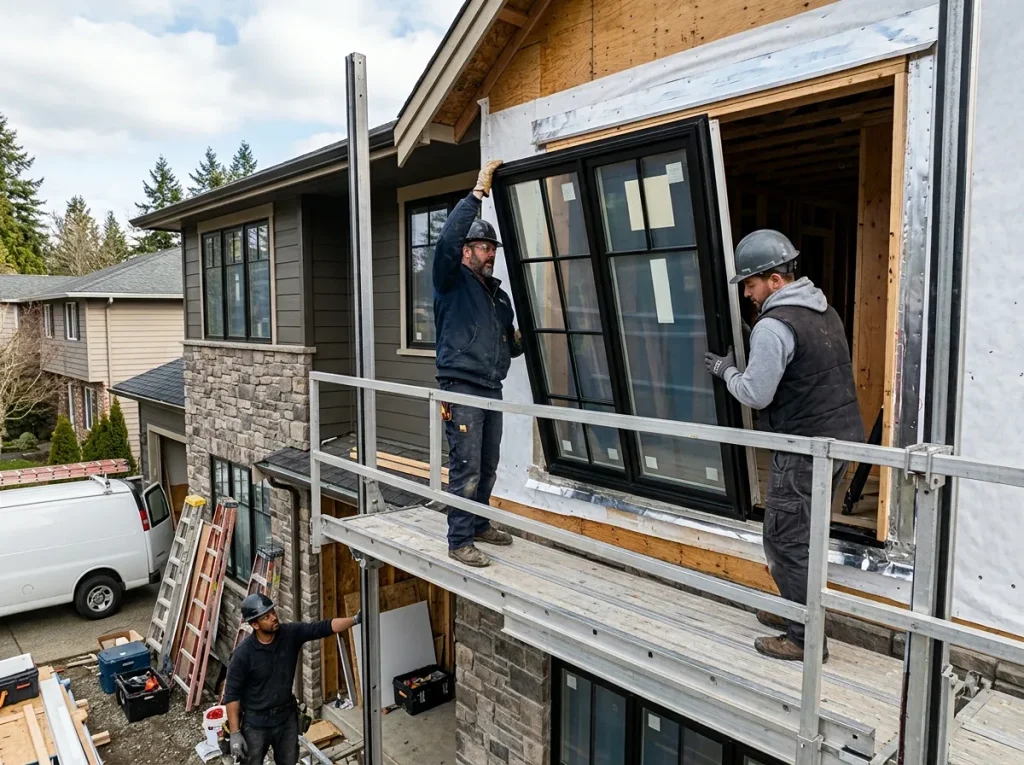
- Lift the window into place: With help (windows can be heavy and awkward), they carefully lift the window into the opening.
- Center the window: The window is centered in the opening.
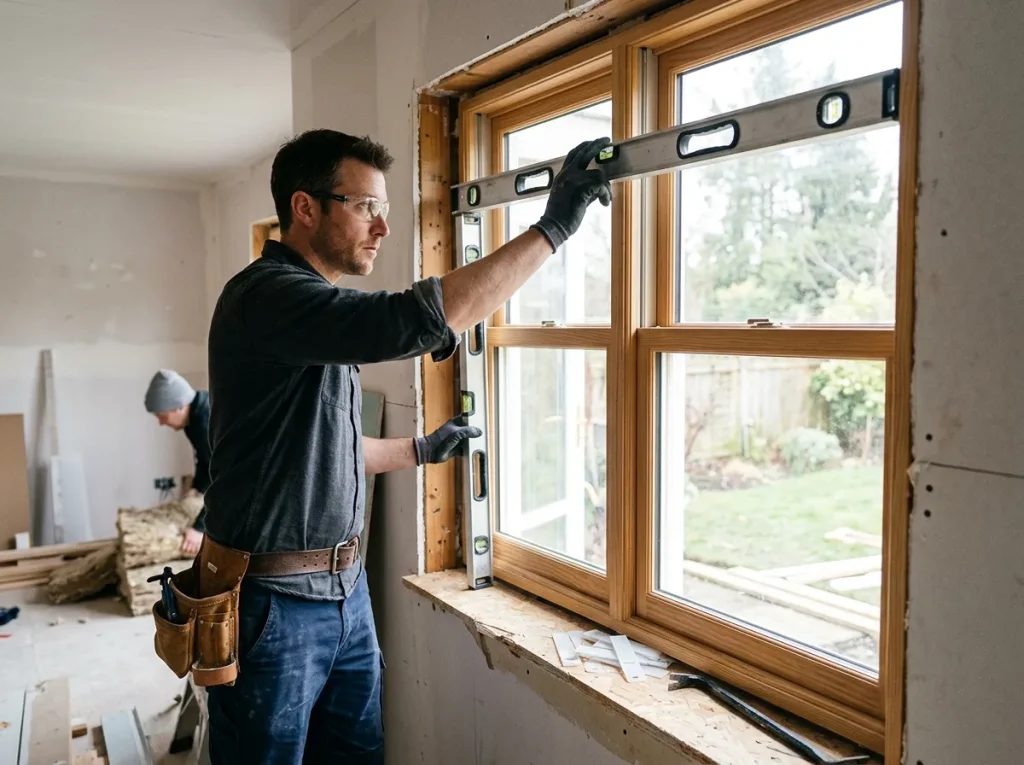
- Check level and plumb: Installers use a level to check all sides of the window, ensuring it’s perfectly aligned.
A note on teamwork: For large or complex installations, having two installers outside and two inside can be helpful. The crew outside can maintain proper spacing, while the crew inside checks for plumb, level, and square.
Step 6: Securing and Shimming
Once the window is positioned correctly, it needs to be secured.
Shimming:
Installers place shims between the window frame and the rough opening at each fastener location. Shims should be at least 1/4 inch back from the interior face of the frame. These shims ensure the window stays square and level while providing a solid anchor point.
Fastening:
The window is then fastened into place according to the manufacturer’s specifications. Fastener spacing varies by window type and size. The window must be fastened to a structural member in the rough opening.
Final check:
Installers check once more that the window is square, level, and operating smoothly. They test the sashes to ensure they open, close, and lock properly.
Step 7: Insulating and Sealing
With the window secured, the installers fill the gaps between the window frame and the rough opening.
Insulation:
They use low-expanding spray foam or fiberglass insulation to fill gaps. Low-expanding foam is preferred because it won’t bow the window frame as it expands. Some installations also use backer rod for larger gaps.
Sealing:
Installers apply sealant over fastener holes and around the exterior of the window frame. This creates a weathertight barrier that prevents air and water infiltration.
Weatherstripping check:
They verify that the weatherstripping is intact and properly sealing the window when closed.
Step 8: Finishing Touches
The installation is nearly complete, but there are still a few important steps.
Interior trim:
Installers reattach or install new interior trim around the window. This covers the gap between the window frame and the wall, giving the window a finished appearance.
Exterior trim and caulking:
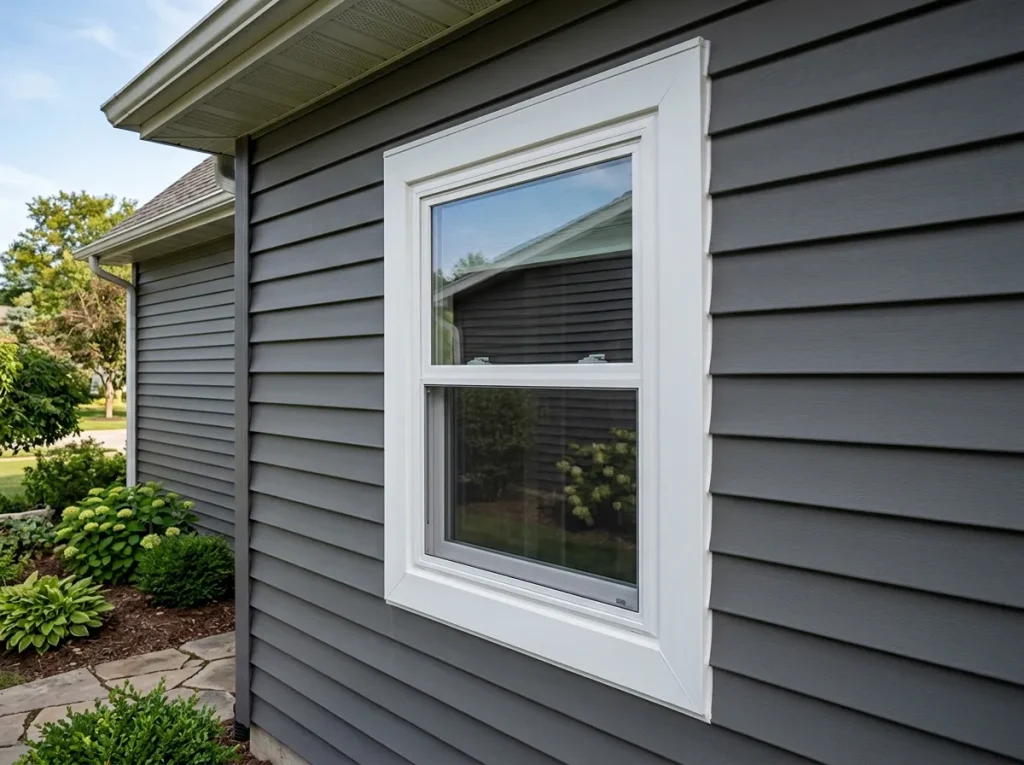
They apply exterior caulk around the perimeter of the window to seal any remaining gaps and create a clean, finished look.
Cleanup:
The work area is cleaned up, with all debris removed from your property. Your home is left looking as though the new window has always been there.
Final inspection:
Before the installers leave, they walk through the installation with you, showing you how to operate the window and answering any questions you have.
How Long Does the Window Installation Process Take?
Per window: A standard replacement window takes about 30–60 minutes to install, including removal, prep, fitment, insulation, sealing, and trim.
Full home: A skilled team can install 6–8 windows in a full working day. For a typical home with 10–15 windows, the project can be completed in 1–2 days. More complex projects—like multi-story homes or custom windows—may take 2–3 days.
Factors that affect timeline:
- Window type: Casement windows are typically easier to install than sliding sash windows, which can take longer due to their weight and balance mechanisms.
- Building condition: Older properties often have uneven wall openings or non-standard sizes.
- Access: Multi-story homes or difficult-to-access areas require scaffolding or ladders.
- Retrofit vs. full-frame: Retrofit installations (fitting new windows into existing frames) are faster than full-frame replacements.
Real-World Conditions: The “If/Then” Guide
Here’s how the installation process varies based on your specific situation:
If you’re replacing windows in an older home → Then expect additional time for repairs. Older homes often have rot, uneven openings, or non-standard sizes that require extra prep work.
If you’re on a ground floor → Then installation is quicker and safer than upper floors. Ground-floor windows don’t require scaffolding or ladders.
If you’re doing a full-frame replacement → Then expect the process to take longer than a retrofit. Full-frame replacement involves removing the entire frame, trim, and possibly some wall material.
If you have custom or oversized windows → Then factor in additional time. Specialty shapes or large units can take up to 2 hours per window.
If you’re concerned about warranties → Then professional installation is essential. Improper installation can void manufacturer warranties. A strong window warranty should cover glass, frame materials, hardware components, and professional installation.
If you want the best energy performance → Then prioritize proper sealing and insulation during installation. Even small air leaks can significantly reduce energy efficiency.
If you’re considering DIY → Then think carefully about the risks. A botched DIY installation can cost $300–$500 to fix, while a professional job ensures it’s done right the first time.
Professional Installation vs. DIY: The Real Cost
Let’s be honest about the DIY temptation. On the surface, installing your own windows seems like a way to save money. But here’s what most people don’t realize.
The hidden costs of DIY:
- You need to purchase specialized tools (levels, shims, pry bars, caulk guns, and more)
- One wrong measurement means extra materials or a window that doesn’t fit
- A failed installation can lead to water damage or higher energy bills that require professional repair
- Most manufacturer warranties are voided by DIY installation
- The most common DIY failures are improper sealing, lack of structural assessment, and incorrect leveling—all of which directly impact energy efficiency and window lifespan
What professional installation gives you:
- All-inclusive pricing with no hidden costs
- Trained installers who know the techniques for plumbness, squaring, and leveling
- Proper waterproofing that prevents rot and mold
- Warranties that protect both the product and the installation
- Peace of mind that the job is done right
According to industry experts, what starts as a money-saving DIY can spiral into costly repairs, warranty voids, and resale issues if not done correctly.
The Regrets Homeowners Mention Most
After working with thousands of Arizona homeowners, here are the most common regrets about window installation:
Mistake 1: Not asking about the installation process upfront
Some homeowners focus entirely on the window product and never ask about how it will be installed. Then they’re surprised when the installation takes longer than expected or when they see steps they didn’t anticipate. Ask your installer to walk you through the process before you commit.
Mistake 2: Choosing the cheapest installer
The lowest bid often cuts corners on critical steps like waterproofing and proper sealing. These steps aren’t optional—they’re essential for long-term performance. Saving $200 on installation can cost you thousands in repairs later.
Mistake 3: Not checking the warranty for installation coverage
Some warranties cover the window product but not the installation labor. If your window fails due to improper installation, you could be stuck paying for the repair yourself. Make sure both are covered.
Mistake 4: Assuming all windows are installed the same way
Different window types—sliding, casement, double-hung—have different installation requirements. A one-size-fits-all approach doesn’t work. Professional installers know the specific requirements for each window type.
Mistake 5: Not preparing for installation day
Failing to clear the area around windows can slow down the installers and increase the time the project takes. A little preparation goes a long way.
For more detail on what can go wrong—and why professional installation matters—check out our guide on common window installation mistakes.
Frequently Asked Questions
How long does window installation take per window?
A standard replacement window takes about 30–60 minutes to install, including removal, prep, insulation, sealing, and trim. More complex or custom windows can take up to 2 hours.
What’s the difference between retrofit and full-frame installation?
Retrofit installation fits new windows into your existing window frames—it’s faster and less expensive. Full-frame installation removes the entire existing frame down to the rough opening—it takes longer but allows for inspection and repair of the underlying structure.
Why is waterproofing so important during window installation?
Water infiltration is the #1 cause of window failure. Improper waterproofing can lead to rot, mold, and structural damage that costs thousands to repair. Professional installers use waterproof membranes and flashing to create a watertight seal.
Can I install windows myself?
While DIY installation is possible for single-story homes with standard windows, it comes with significant risks. A botched installation can void your warranty, reduce energy efficiency, and lead to water damage. For most homeowners, professional installation is the safer, smarter choice.
What should a window warranty cover?
A strong warranty should cover the glass, frame materials, hardware components, and professional installation. Watch out for warranties that exclude labor or have confusing fine print.
How much does professional window installation cost?
A standard replacement window costs $500–$1,000 installed in 2025. The average double-hung, double-pane vinyl window is around $600**. Labor typically adds another **$300 to the cost. For more context on window replacement costs, check out our detailed pricing guide.
How do I know if my windows were installed correctly?
Signs of poor installation include drafts, difficulty opening or closing, condensation between panes, and visible gaps around the frame. If you notice any of these issues, have a professional inspect your windows.
What’s the best time of year for window installation?
Spring and fall are ideal for window replacement process due to better weather and material performance. However, professional installers can work year-round with proper precautions.
Why Choose Windowz4Less Arizona?
Professional window installation is an investment in your home’s comfort, energy efficiency, and value. Who you choose to do the work matters.
Windowz4Less Arizona specializes in window installation for homes across the Phoenix metro area.
- Local expertise — We know Arizona’s unique climate challenges and install windows that perform in extreme heat
- Professional installation — Our team is trained, insured, and follows industry best practices for every installation
- Quality products — We partner with leading manufacturers to offer windows built for Arizona conditions
- Transparent pricing — No hidden fees, no surprises
- Warranty protection — We stand behind our work with comprehensive installation warranties
- Serving Mesa, Phoenix, and surrounding areas — We’re your local experts
When you work with us, you’re not just getting new windows—you’re getting peace of mind that the job is done right.
Your Next Step: Get Started with Professional Installation
Understanding the window installation process is the first step. The next step is getting started with a professional team that will do it right.
Contact Windowz4Less Arizona today for a free, no-obligation estimate. We’ll walk you through the entire process, answer your questions, and provide professional installation you can trust.